
It was a summer afternoon and I needed something simple to keep kids busy indoors. I didn’t want screens, I didn’t want a complicated craft, I just wanted something creative, calming and fun.
Then I decided to make a simple friendship bracelet with String and Beads. I call my kids to the dining room and tell them about this plane.
They happily agreed to it, then we started our work.
When we started to make bracelets for the first time, I didn’t expect that it would turn into one of our favorite indoor activities.
If you have never tried this before don’t worry let me walk you through exactly how I do it, what works best and avoid a few small mistakes I learned along the way.
You just need to read it completely because if a single step is missed then you will repeat the same mistakes which I did and all fun will be wasted, so don’t miss any single step.
Why Making a Bracelet with String and Beads Is Great for Kids
There is something very special about handmade bracelets. They are simple, but they make kids feel proud. You can see the confidence on their face when a child wears something they made themselves

I’ve noticed three big benefits when we do this activity:
- It improves focus, because threading beads carefully onto string requires patience.
- It strengthens fine motor skills as well as Art and Crafts skills.
- It encourages creativity, kids get to choose colors themselves, patterns and even spell their names.
Plus, it is affordable most of the time, You already have the supplies at home.
Materials We Used to Make the Bracelet at home
Over the time, I have tested different materials to make the bracelets but some of them worked great some didn’t.
Below I listed one of them which worked perfect for us.
Here’s what I personally recommend:
- Stretchy elastic cord (this is my favorite for beginners)
- Medium-sized plastic beads (not too tiny)
- Alphabet beads (optional but kids love them)
- Scissors
- A small bowl to hold the beads
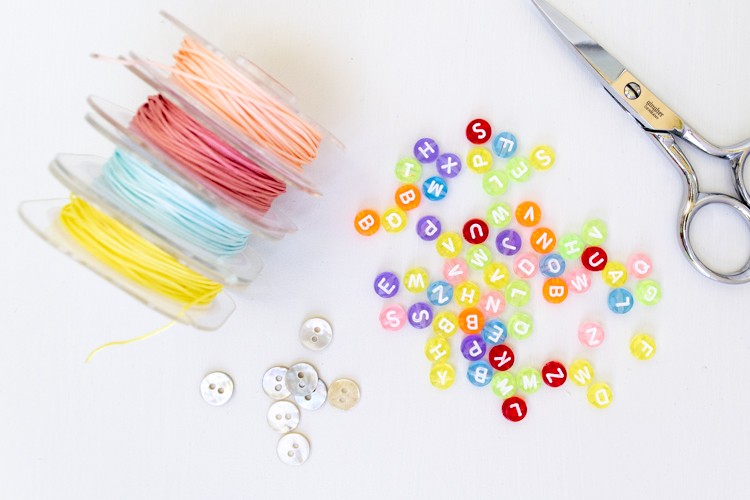
I prefer elastic cord because it doesn’t require metal clasps. This thing makes it much easier for kids. When I used a regular thread for the first time the bracelet didn’t stretch and it was hard to put on the hand.
I noted this mistake and didn’t use it again so I think you should also avoid using it, otherwise you can prefer what you can arrange easily. If you are doing this with younger kids avoid using very small beads. They can be frustrating to handle and it may not be safe.
Step-by-Step: How to Make a Bracelet with String and Beads
Step 1: Measure the String Properly
In the beginning, I used to guess the string length. But when I put it on my older daughter’s wrist it was too much tie.

I wasted this string and took another after measuring the correct size. It was my big mistake.
Now I always wrap the string gently around the child’s wrist and add about two extra inches.
The extra length is important because you’ll need space to tie strong knots later.
After cutting the string, I tie a temporary knot at one end. Sometimes I also tape one side to the table.
This prevents beads from sliding off especially helpful if kids are excited and moving quickly.
How to made Edible Finger Painting Craft for Babies at home explore our step by step guide.
Step 2: Choose Your Bead Pattern
This is where I let the kids take control.
Sometimes they choose random colors. Sometimes they make patterns like pink-blue-pink-blue. And sometimes they spell their names.

One time, we made “friendship bracelets” with matching colors. Another day, we made rainbow bracelets in exact color order.
I usually pour the beads into a bowl and let them sort the colors first. Sorting itself becomes a mini activity.
If your child feels confused about what pattern to make, I suggest starting simple:
- Alternate two colors
- Use all warm colors
- Create a repeating pattern of three beads
I didn’t try to correct their design choices. Even if the colors look “messy” to me, it’s their creation.
If you pressurize or punish them for spending so much time choosing the correct design.
They will lose confidence and our main purpose is to maintain their happiness and confidence.
So don’t pressurize or punish them on small mistakes. Just look at them with patience, how they are doing it.
Step 3: Thread the Beads Carefully
Threading beads looks easy, but it takes focus.

At first, some kids get frustrated because the string bends or the bead hole feels small.
When it happens, I gently show them how to hold the bead steady and guide the string through slowly.
I have noticed that encouragement really helps here. Instead of fixing it for them, I say, “Try again, slowly.”
When they succeed on their own, it builds real confidence in them.
We continue adding beads until the bracelet almost fits around the wrist comfortably.
Step 4: Check the Size Before Tying
Before tying the final knot, I always check the size.
I wrap it gently around the wrist without stretching too much. If it feels too tight, we remove one bead. If it feels loose, we add one more.
This small check prevents disappointment later.
Trust me nothing is worse than finishing the bracelet and realizing it doesn’t fit.
Step 5: Tie a Strong and Secure Knot
This is the step where I step in a little more, especially with younger kids.

With an elastic cord, I pull both ends tight and tie a double knot. Then I tie one more knot for safety.
If I want extra durability, I add a tiny drop of glue on the knot and let it dry for a few minutes. This prevents the bracelet from breaking during play.
Finally, I trim the extra string carefully.
Sometimes instead of cutting extra string I try to hide the knot inside one of the beads so it looks neat.
If you also want to learn how Melted Crayon Butterflies Craft are made you can check our step by step guide.
Common Mistakes to Avoid When Making a Beaded Bracelet
Let me share a few mistakes which I learned through many times of making it.
- Cutting the string too short
- Using non-stretch thread for beginners
- Choosing beads that were too small
- Not tying a strong enough knot
The first bracelet we ever made broke within an hour because I tied only one knot. After that, I always tie double or triple knots for elastic bracelets.
How We Turn Bracelet making Into a Fun Indoor Activity
Sometimes we make just one bracelet, Other times we turn it into a small “bracelet-making afternoon.”
I put on soft background music, place all beads in separate bowls, and let the kids design freely. It becomes a calm and creative time.
On birthdays, we have even used this as a mini party activity. Each child makes their own bracelet at home.
You can also connect this activity with learning:
- Practice spelling with alphabet beads
- Create color pattern sequences
- Count beads while threading
It becomes fun and educational at the same time.
Why This Simple Craft Means So Much
To be honest, this activity is not just about making bracelets.
It’s about sitting together without distractions. It’s about small conversations while hands are busy. It’s about creativity without pressure.
Every time I see a child proudly wearing a bracelet they made, I’m reminded that simple crafts often create the best memories.
You don’t need expensive kits. You don’t need complicated instructions.
Just string, beads, and a little patience. Watch This video for step by step explanation.
Final Thoughts
If you’re looking for an easy indoor craft that is affordable, creative, and beginner-friendly, making a bracelet with string and beads is a wonderful choice.
Start simple. Let kids experiment. Don’t aim for perfection.
The beauty of this activity is in the process, not just the final bracelet.
Kindly share your ideas below in the comment section. Did you find worth it or not ? If you find worth it kindly share it with others. Your one click can change someone’s bored time into fun.
Thanks for reading !!